Well here we go, part 2. For those of you who want to have a go at making one of these yourself The Hungarican Chick has a lot of good information and design ideas.
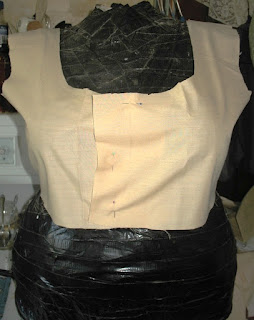
So here is the mock-up/lining for the bodice. I added 3 inches to the bottom of the bodice pieces so I can get the waist band just where I want it. Not up at my nipples and down at my belly button, those would be completely different dresses.
 I dug up a piece of fabric in a nice light blue/green colour but alas there is not enough to make the skirt, sleeves and bodice out of it. So it's now just a plain medium blue. I went over to the local fabric shop and picked up some cotton lace and some random trim I may or may not use. But as I type its being dyed blue to match the fabric for the dress. I've also have been doodling some more today with sleeve and bib ideas.
I think on this dress I'm going to go with the longer sleeve or a 3/4 length. I traced a full length sleeve pattern to play with, I'm going to cut one out of some scraps kicking around here to play with style and the length.

So I've went with the 3/4 length sleeve and put a few larger pin tucks in at the edge, I also did the matching tucks on the hem of the skirt and the top of the bib . Here is the modified sleeve pattern with the extra section for the pin tucks.
 . Here is the modified sleeve pattern with the extra section for the pin tucks.
This is the finished tucks at the hem line of the skirt and an idea of the shade of blue.
And I got the bodice pieces all sewn together, turned and pressed.
I got the sleeves and bib pinned and ready to run through the machine.
Tomorrow I'll work on basting the sleeves into the bodice and pinning the skirt on... that's going to be a lot of pins.


No comments:
Post a Comment